Lets begin by selecting Next on this First pop up Screen ;

Choose English and Click Next
>

Choose U.S English then Click Next >

Select “Skip Entering Installation
Number” and then Select “OK”

Select ”Yes” to Format the Disk and Prepare

Select “ Create Custom Layout” on
the Drop down List and select “Next”

Select the “Free Space” and then
Select “New”.

Select the File System to “Swap”
and specify your swap Size i.e. Please note that your Swap size should be 1.5
multiply your RAM Size.

This Will be the Output

Let’s Continue to Specify the Root
Partition which will be used to Install the Linux OS
Select the “Free Drive” and then
Click “New” Specify the root ‘/’ partition then specify the remaining size and
then click Next >

On Selecting the Boot Loader leave default and then Select Next >

On this Screen Specify the the
machine name by selecting the “manual”
button and specify your PC Name ‘PC 1’ then select next

On the next screen Select Date and
time for your Time zone as shown on the drop down box then select Next >

Specify the root Password by typing it and Confirming it.
This account will be having the username of root and the password which will be
specified on this Section.

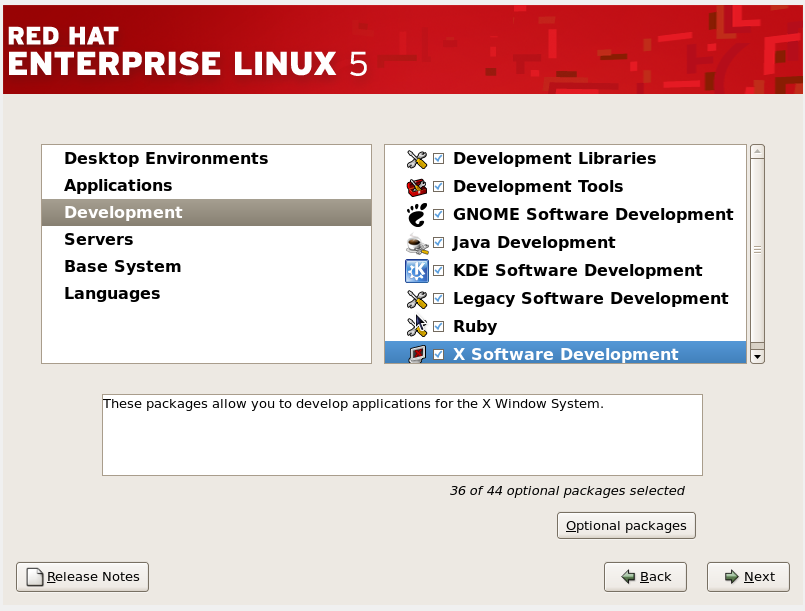
On this next screen Select Customize now below and select
next tp select what application to be installed with Redhat:
There are some packages that Oracle requires and you must
make sure you install them before even you begin Oracle installation Process.

Select every package on the Development Section:
Select the servers shown on the Servers application without
forgetting to select the DNS Name Server above:

On the Base System Section Select every option available at
the section:

On the Application Section select every option available:

After all that Click Next to Begin Installation:

After the Installation Process Select
reboot:

On the Next Screen select Forward :

On the Next Screen select Yes I agree to the License Agreement then select
Forward :

On the next Screen, for learning
purpose go to the drop

On the SE linux Page disable SE
Linux and then Click Forward <Oracle Recommendation>:

On the Kdump Screen leave the default option and then Click
forward

On the Date and Time Screen, leave default settings and then
Click Forward >

On the Set up Software Updates Screen, select “No I Prefer
to Register at Later times” .

On the Create User Screen, create a normal user who will not
be an administrator, remember we already have a root which we already specified
at the beginning.

On the Sound Card Screen leave
default and then Select forward:

On the Addition CD’s

The Machine will Reboot and now you can login and Begin the
Oracle Preparations. Make Sure you Login as Root user :
Please don't hesitate to Contact me on +255 718 418 607.
ReplyDeleteImetulia sana Brother, keep it up..
ReplyDeleteImetulia sana Brother, keep it up..
ReplyDelete